The PX15C (see https://paxer.net/voyager/) is a HP15C calculator
made by Alejandro (Alex) Garza and it is a real marvel of engineering. The original HP15C machine code
runs inside an ATMEGA328P 8-bit AVR microcontroller allowing for a compact and simple circuit design with
a very low power consumption. It consumes only about 2μA while in off state (microcontroller sleeping, clock running). You can buy it as a kit at
https://www.tindie.com/products/hobbystone/px-15c-an-hp15c-emulator/.
It's a project that is still evolving and Alex is open to new ideas. Modern 3d-printing has given us the tools to build professional keyboards and cases in small quantities and at low cost. Alex had already a 3d-printed case with flat keys. Why not try a keyboard with HP like bevelled keys?
At the heart of this design is Alex's PX15C board with small tactile switches (6mm x 6mm x 7mm = w x l x h). The case and the keyboard with HP like keys are 3d-printed.
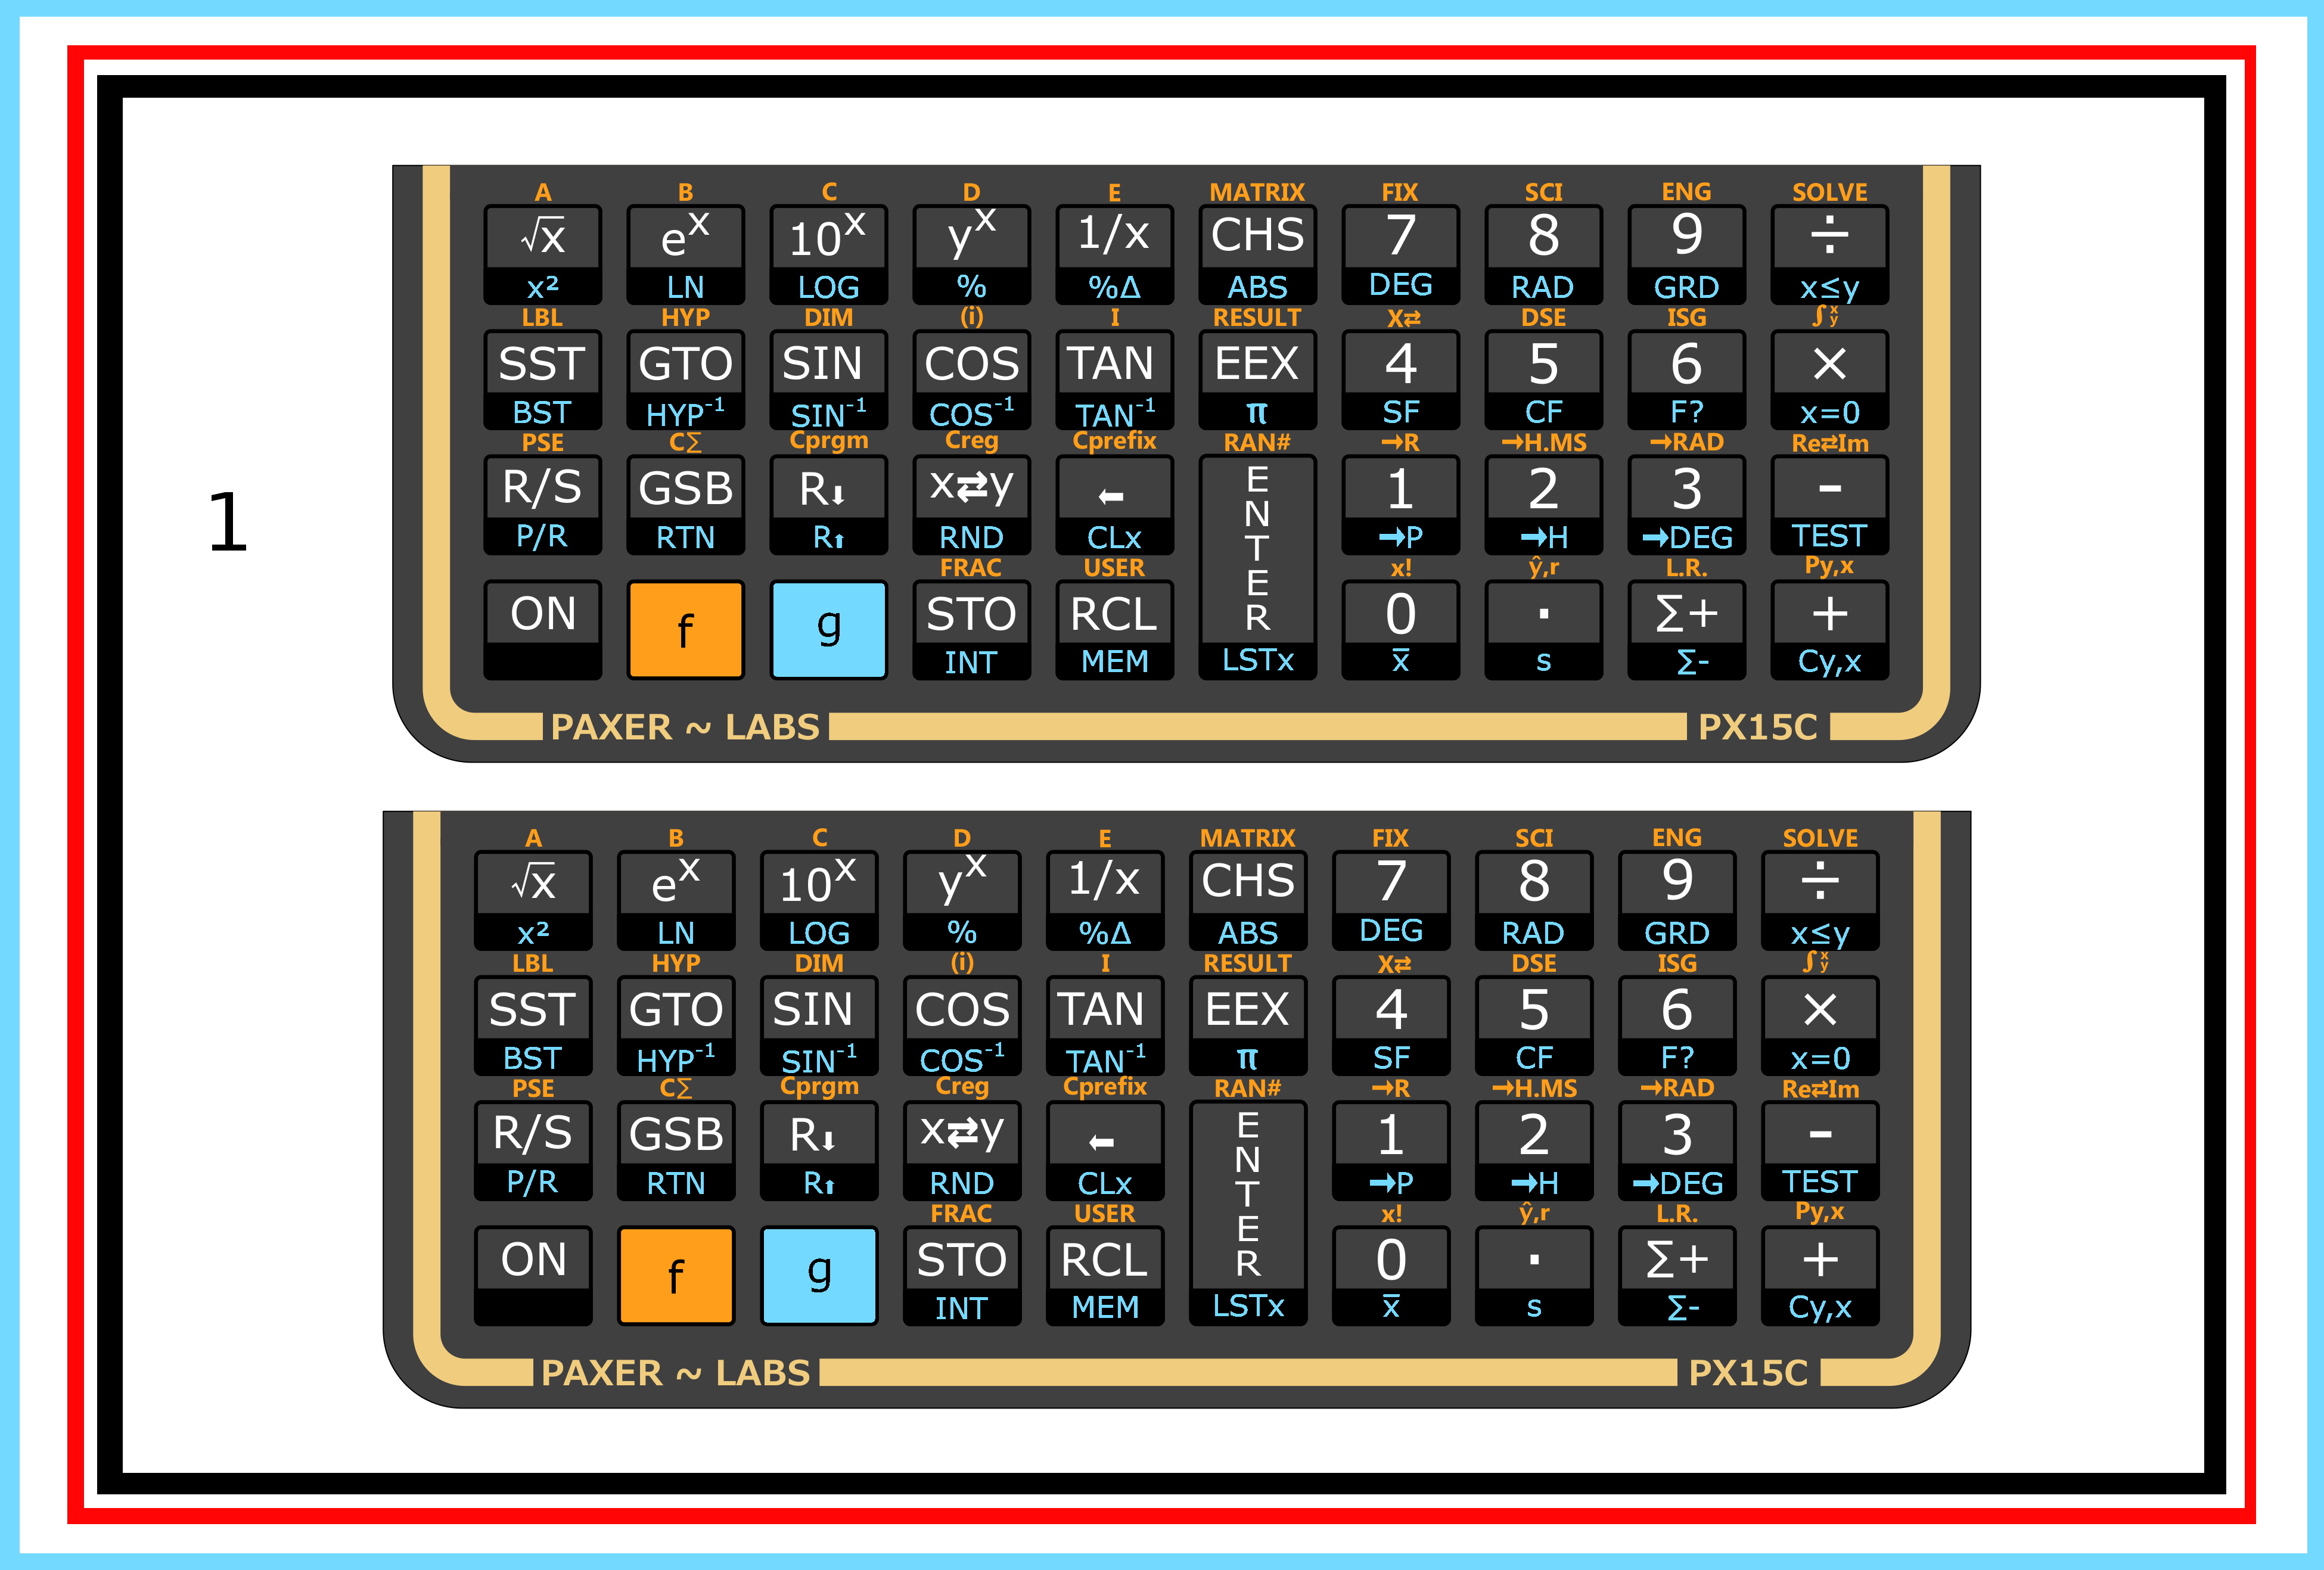
PX15C with HP like keys
How to label the keyboard
The challenge is not the keyboard itself but the keyboard labels.
The obvious choice was a failure: professionally printed vinyl stickers. There are shops that print custom plastic stickers and you would think that you could just print the keyboard labels, peel them off and stick them onto the 3d-printed keyboard. It failed. The glue on the stickers is not permanent. The plastic material is flexible but it has a tendency to return to it's original flat state. You can stick it to the keys but when you come back after a few hours you find that half of the sticker have come off again.
Paper or thin cardboard. It sounds strange but this is the perfect material: Paper is a very durable material and old documents show that it can last for hundreds of years if you keep it dry. It can be spray painted with a waterproof clear coat to protect it. The pores in the paper will absorb some of the clear coat. This ensures a proper bond between paper and paint while the paint film on top of the paper will keep any humidity away. Paper can also be pre-folded and bent into the bevelled shape of the key.
Assembly
The keyboard labels (see reference section at the end of the article) can be printed with a good color laser printer on thin cardboard, weight 148g/m^2 = 67lb.
Cut the labels out with sharp scissors and round the upper corners a bit. As a glue I use "LePage 100% repair gel". This is a low odor solvent free glue that sticks well to porous and non porous surfaces.
I use pliers to pre-fold the labels for the bevelled edge of the keys. Tweezers are useful to put the labels in place and I remove any excess glue with a toothpick.
tools and setup
To cut out the keys and carefully stick them to the keyboard is a lot of work but it's also fun. It takes me about 40min to build one keyboard.
trying different papers and materials: the keyboard on the left has lables made from a thin gloss cardboard
At the end you just wait a bit until the glue is dry and then you spray paint it with a layer of clear coat.
Vinyl stickers don't work on the keys but they stick well to the flat area of the case:
vinyl stickers on the case
I really enjoyed working with Alex. He is open to new ideas and it's fun to work with him. It was great to try different designs. The keyboard works really well. I have used it extensively and it's at least as good as the original HP15C. I did not make a single typo yet. The keyboard has a strong tactile feedback and every click registers. You can focus on the mathematical problem which you want to solve and have the confidence that the calculator does what it's supposed to do.
The PX15C with bevelled keys
Here is a version with a slightly different key shape. The top area is a bit bigger. To achieve this the back of the key has to be hanging over slightly. The white part of the key label area fits more comfortably on this design. These keys have been printed with black PLA plastic and they look better than the whites ones. It requires however more precision in terms of label cutting and glueing since there is less space between key and case.
The PX15C with the bigger version of the bevelled keys
Key labels made with photo paper
Professional photo paper as used in photo labs is a very strong and durable material. The only problem is size and scaling. Many photo labs crop your photos. I have created therefore jpg files of slightly different size and all are to be printed 4x6 paper (10cmx15cm) without any border. The best is to use a photo service with an online web-site where you can turn off automatic color correction and edit the photo to select the amount of crop (you want no crop at all so zoom out as much as possible).
I cut the labels out with normal sharp scissors. I pre-fold them at the edge of flat clean pliers and then I glue them on with "Lepage 100% repair gel". It's the same process as for the lables made with laser printed cardboard. Finally I seal the entire keyboard with a transparent clear coat (gloss in this case).
The colors are more vibrant. Jpg files to print on photo paper are available in the reference section.
The PX15C, keyboard labels made from photo paper
My local photo lab uses "Fujicolor Crystal Archive Supreme Paper" (https://www.fujifilm.com/us/en/business/photofinishing/paper-lab-products/supreme-paper/features , it has "excellent image stability". Whatever that means.). I don't know what will happen if it is exposed to strong sunlight for a long time but if the calculator is kept in a pouch or a box then it will certainly last for several decades without fading.
3D-print, test and adjust
Test the keyboard and case combination before you start to label it. Especially the lid on the back of the case might need some adjustments.
If the case does not close easily then file off the noses on the sides of the lid. A sharp wood
chisel works also quite well to scrape off a few 1/10 of a millimeter. Be careful to not cut yourself when working
with a wood chisel. The lid has two rails on the inside that
hold the area below the keyboard. Lower them if they are pressing too hard onto the board.
You can use hot-melt glue to increase the distance between the back of the keyboard and the tactile switches. Put a bit of hot-melt glue onto the posts inside the case if needed.
The keys should release the buttons properly but they should also not feel loose.
References
Note that I have no control over any product changes that may happen over the years. Please check for compatibility before downloading and printing any of the STL files. These files were good for the PX15C as sold in 2022.
If you print the case and/or the keyboard at a general purpose 3d-print shop then select the following: Process: Fused Deposition Modeling (FDM), Material: Plastic Filament, PLA (Polylactic Acid), Layer height: 0.2mm (=200 micron) if possible use a layer height of 0.1mm (=100 micron) for a smoother key surface. If you use 0.2mm layer height then file and sand-off any bumps that the keyboard frame has. Run the side of a small file between the rows of keys.
You can search for 3d-printing services near you (there are web sites were you can order 3d-printing) but Alex has also a 3d printer and might be able to print the case and the keyboard for you.
A good stl file viewer for linux is meshlab. An online stl file viewer can be found at https://www.viewstl.com/ .


